https://firstcloud.es

Elevating Your Business with Innovative Cloud Solutions

  • Home
  • Our Services
  • Home Lab
  • Nested
  • About Us
  • Contact Us
  • Clock
  • Blog
    • Building Real-World Blockchain Fintech Products
    • Have hands-on experience on a broad range of real-world blockchain and fintech development patterns, including:
    • In-Place Upgrade from Windows Server 2003 to Windows Server 2025 with Active Directory Schema Update
    • In-Place Upgrade from Windows Server 2000 to Windows Server 2003 with Active Directory Schema Update
    • MD102 – Endpoint Administrator Labs
    • Tutorial: Design a relational database in Azure SQL Database C# and ADO.NET
    • Design Database Diagrams (Visual Database Tools)
    • Running stand-alone Nutanix software?
    • Interesting VMware Homelab Kits for 2025
    • Create as relational CMDB in MS SQL for inventory
    • What is Active Directory (Top 50 AD Questions Answered)
    • Memorabilia – Windows 2000

In-Place Upgrade from Windows Server 2003 to Windows Server 2025 with Active Directory Schema Update

05.17.2025 by pablovillaronga //

With the release of Windows Server 2025, many organizations are looking to modernize their aging infrastructure. However, if you’re running a Domain Controller (DC) on Windows Server 2003, be aware that direct in-place upgrades to Windows Server 2025 are not supported.

This article outlines a multi-step upgrade path to bring your AD environment from Windows Server 2003 to Windows Server 2025, ensuring both functional continuity and schema compatibility.


🚨 Important Notes Before You Begin

  • No direct in-place upgrade from 2003 to 2025 is supported. You’ll need to upgrade through at least one intermediate OS, such as:
    • Windows Server 2003 β†’ 2008 R2 β†’ 2012 R2 β†’ 2019 β†’ 2025
  • This article focuses on schema updates and Domain Controller modernization.
  • In-place upgrades should only be done if absolutely necessary; Microsoft strongly recommends migrating to newer servers and promoting them instead.

🧰 Prerequisites

  • A complete system and Active Directory backup of the 2003 server.
  • Functional and healthy AD environment (test using dcdiag and netdiag).
  • The Windows Server 2003 DC is running SP2.
  • Upgrade media for intermediate versions (2008 R2, 2012 R2, 2019, 2025).
  • Sufficient hardware to meet modern OS requirements.
  • FSMO roles transferred, or a strategy to migrate them properly.

πŸ”„ Step-by-Step Upgrade Path

You must first upgrade the schema and then upgrade the DCs through intermediate versions.


🧱 Step 1: Upgrade Active Directory Schema for Windows Server 2008 R2

On your Windows Server 2003 Schema Master:

  1. Insert the Windows Server 2008 R2 DVD.
  2. Run: adprep32 /forestprep adprep32 /domainprep

adprep32 is used on 32-bit servers. If on 64-bit, use adprep.

  1. Wait for confirmation messages and ensure replication is complete.

πŸ’» Step 2: In-Place Upgrade to Windows Server 2008 R2

  1. Boot into Windows Server 2003.
  2. Run setup from Windows Server 2008 R2 DVD.
  3. Choose Upgrade option.
  4. Complete the upgrade wizard and allow the server to reboot.

Test domain functionality using:

dcdiag
repadmin /replsummary

πŸͺœ Repeat Upgrade Process

Repeat schema upgrades and OS upgrades through these steps:

πŸ‘‰ 2008 R2 to 2012 R2

  • Run adprep /forestprep and adprep /domainprep from 2012 R2 media.
  • Then do in-place upgrade to Windows Server 2012 R2.

πŸ‘‰ 2012 R2 to 2019

  • Again, run adprep /forestprep and adprep /domainprep from 2019 media.
  • Perform in-place upgrade to Windows Server 2019.

πŸ‘‰ 2019 to 2025

  • Run adprep /forestprep and adprep /domainprep from Windows Server 2025 media.
  • Finally, do in-place upgrade to Windows Server 2025.

πŸ” Schema Version Reference

Each schema update bumps the objectVersion:

Windows ServerSchema Version
200330
2008 R247
2012 R269
201687
201988
2025TBD (expected > 88)

Check schema version using:

reg query "HKLM\SYSTEM\CurrentControlSet\Services\NTDS\Parameters" /v "Schema Version"

Or:

ldifde -f export.txt -d "cn=schema,cn=configuration,dc=domain,dc=com" -l objectVersion

βœ… Post-Upgrade Validation

After reaching Windows Server 2025:

  1. Run dcdiag and repadmin /showrepl.
  2. Check DNS and SYSVOL replication.
  3. Confirm that Group Policies, login scripts, and replication function as expected.
  4. Optionally raise the domain and forest functional levels using Active Directory Domains and Trusts.

πŸ’‘ Migration Tip

Instead of in-place upgrades, a better long-term approach is:

  • Stand up a new Windows Server 2025 machine.
  • Promote it to a DC using dcpromo (or Server Manager).
  • Transfer FSMO roles.
  • Demote and decommission the old Windows Server 2003 DCs.

This method is cleaner, safer, and future-proof.


Conclusion

While it’s technically possible to upgrade from Windows Server 2003 to 2025 via in-place upgrades and schema updates, the process is multi-step and risky. Whenever feasible, build a modern AD environment on fresh hardware or VMs, then migrate.

If you’re looking for assistance in planning, executing, or automating Active Directory modernization, contact our team to get expert help tailored to your environment.


Would you like this article formatted for WordPress (with proper headings and shortcodes), a downloadable PDF version, or turned into a step-by-step video script?

Categories // Unix Tags // 2025, from Windows 2003, Upgrades, Windows

In-Place Upgrade from Windows Server 2000 to Windows Server 2003 with Active Directory Schema Update

05.17.2025 by pablovillaronga //

Here’s an article that walks through an in-place upgrade of a Domain Controller from Windows Server 2000 to Windows Server 2003, including the Active Directory Schema update.


In-Place Upgrade from Windows Server 2000 to Windows Server 2003 with Active Directory Schema Update

Upgrading legacy systems is a critical step in maintaining a secure and manageable IT infrastructure. While Windows Server 2000 reached the end of support many years ago, some organizations may still operate legacy Domain Controllers. In this guide, we walk through the process of performing an in-place upgrade from Windows Server 2000 to Windows Server 2003, including the necessary Active Directory schema update.

⚠️ Note: Although Windows Server 2003 is also out of support, upgrading from 2000 to 2003 may be a transitional step before migrating to newer systems (e.g., Windows Server 2019/2022).


Prerequisites

Before starting the upgrade, ensure the following:

  • You have a full system backup of the Windows 2000 Server.
  • The server is running Windows 2000 Server with Service Pack 4.
  • The Domain Controller has enough disk space and meets minimum hardware requirements for Windows Server 2003.
  • You have the Windows Server 2003 installation media and a valid license key.
  • All domain services are functioning properly (DNS, replication, etc.).
  • The server is not running FSMO roles exclusively, or you’ve planned FSMO role handling appropriately.

Step 1: Check Forest and Domain Functional Level

Windows 2000 supports only Windows 2000 forest and domain functional levels. Windows Server 2003 can still operate in this mode but consider raising functional levels later if all DCs are upgraded.


Step 2: Prepare Active Directory Schema

You must update the Active Directory schema before upgrading the first Domain Controller. This is done from the Windows Server 2003 installation media.

Run adprep /forestprep

  1. Insert the Windows Server 2003 CD into a domain member or schema master.
  2. Navigate to: D:\i386
  3. Run: adprep /forestprep
  4. You’ll be prompted to confirm. Type C and press Enter.

This operation must be done on the Schema Master. It prepares the forest for Windows Server 2003 domain controllers.

Run adprep /domainprep

After forestprep completes:

  1. Run: adprep /domainprep
  2. This prepares the domain for 2003 domain controllers. Run this on the Infrastructure Master or any domain controller.

Step 3: Verify Schema Upgrade

Use the following to check schema version:

  • Open ADSIEDIT or run: ldifde -f export.txt -d "cn=schema,cn=configuration,dc=yourdomain,dc=com" -l objectVersion
  • Look for objectVersion:
    • Windows 2000: 13
    • Windows Server 2003 RTM: 30
    • Windows Server 2003 R2: 31

Step 4: Perform In-Place Upgrade

Start the Upgrade

  1. Boot into the existing Windows 2000 Server.
  2. Insert the Windows Server 2003 CD.
  3. Launch the setup from within Windows.
  4. Choose Upgrade (Recommended) when prompted.
  5. Follow the wizard steps:
    • Enter the license key
    • Accept the license agreement
    • Select the partition (usually already selected)
    • Confirm settings and proceed with upgrade

During Setup

  • The system will reboot several times.
  • Setup will detect the existing installation and upgrade accordingly.
  • Monitor the process for driver compatibility messages or hardware warnings.

Step 5: Post-Upgrade Steps

After a successful upgrade:

  • Log in and verify system functionality.
  • Open Active Directory Users and Computers to confirm domain connectivity.
  • Run: dcdiag netdiag repadmin /replsummary to validate health of the domain controller.
  • Ensure DNS is functioning.
  • Reapply any custom GPOs, logon scripts, or startup scripts if needed.

Step 6: FSMO Roles and Additional DCs (Optional)

If this DC holds any FSMO roles, verify they are functional. You may consider:

  • Transferring roles to newer DCs.
  • Installing an additional Windows Server 2003 (or newer) DC and promoting it.
  • Eventually demoting and decommissioning the upgraded 2003 DC as part of modernizing your domain.

Final Thoughts

While performing an in-place upgrade from Windows Server 2000 to 2003 is feasible, it’s recommended as a temporary measure. Use this process as a stepping stone to migrate to Windows Server 2016, 2019, or 2022, which offer enhanced security, support, and cloud integration.

If you need help planning or executing your Active Directory modernization, feel free to contact our team.


Windows Server 2003 ISO with Product Key

Windows Server 2003 Service Pack 2, x64 Editions – ISO-9660 CD Image File from Microsoft

https://www.microsoft.com/en-us/download/details.aspx?id=6905

item image #1

Windows Server 2003 ISO with Product Key

Windows Server 2003 Service Pack 2, x64 Editions – ISO-9660 CD Image File

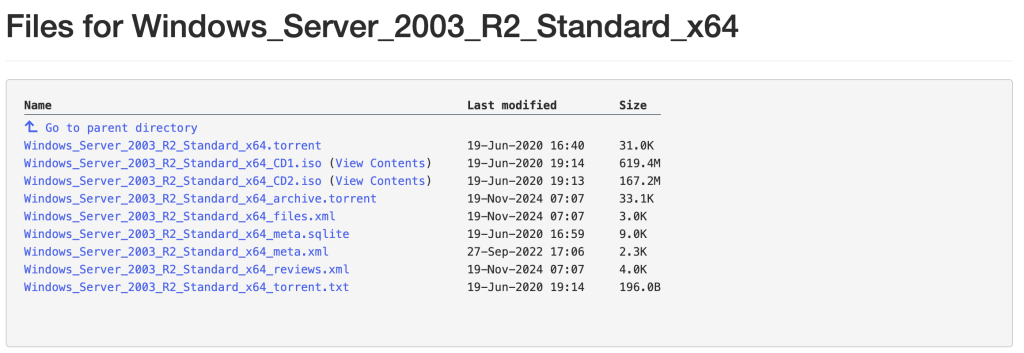
https://archive.org/details/WindowsServer2003https://archive.org/download/Windows_Server_2003_R2_Standard_x64

These ISOs are unmodified versions that were supplied to Technet Subscription subscribers.

Technet subscribers were given Microsoft license keys to use with the software but my uploads do not include license keys.

Microsoft terminated the Technet subscription programme in 2013.

I’ve supplied SHA1 hashes for all ISOs so you can check them against any other records from the time.

I hope these are useful for individuals or companies who have license keys and need to reinstall old but functional software rather than purchase new licenses.

A guide to the filenames:

  • N edition: Satisfies a European Commission ruling by excluding bundled media software.
  • KN edition: Satisfies a Korean Fair Trade Commission ruling by excluding bundled media software and includes links to competing media and messaging software.
  • K edition: Satifies a Korean Fair Trade Commission ruling by including links to competing media and messaging software.
  • x86 – 32bit version
  • x64 – 64bit version
  • SP1,SP2,SP3 – This ISO is the full version of the software including a pre-applied Service Pack, i.e. the ISO isn’t just a Service Pack.

Leave us your comemnts !

Categories // upgrade, Windows Tags // 2003, inplace, upgrade, Windows

MD102 – Endpoint Administrator Labs

05.16.2025 by pablovillaronga //

Practice Lab: Synchronizing Identities by using Azure AD Connect

Summary

In this lab, you will configure synchronization from Active Directory Domain Services to Azure Active Directory.

Scenario

Contoso Corporation is currently managing users in both AD DS and Azure AD as separate processes. This is time consuming and has led to inconsistent information. You have been tasked with addressing this issue by connecting the two directories by using the Azure AD Connect synchronization tool.

Task 1: Configure directory synchronization with Azure AD Connect

  1. On SEA-SVR1, if necessary, sign in as Contoso\Administrator with the password of Pa55w.rd and close Server Manager.
  2. On the taskbar, select Microsoft Edge.
  3. In the address bar, enter http://www.microsoft.com/en-us/download/details.aspx?id=47594
  4. On the Microsoft Azure AD Connect V2 page, select Download. Azure AD Connect automatically downloads to the Downloads folder on SEA-SVR1.
  5. Select Open downloads folder and then in the Downloads window, double-click AzureADConnect.msi.
  6. In the Microsoft Azure Active Directory Connect wizard, on the Welcome to Azure AD Connect page, select the I agree to the license terms and privacy notice check box, and then select Continue.
  7. On the Express Settings page, select Customize.
  8. On the Install required components page, select Install.
  9. On the User sign-in page, ensure that Password Hash Synchronization is selected, and then select Next.
  10. On the Connect to Azure AD page, in the USERNAME and PASSWORD boxes, enter admin@yourtenant.onmicrosoft.com, and your provided password, and then select Next.
  11. On the Connect your directories page, ensure that Contoso.com is listed under FOREST, and then select Add Directory.
  12. In the AD forest account window, select the Create New AD Account option, and in the ENTERPRISE ADMIN USERNAME field, type Contoso\Administrator, and then type Pa55w.rd in the PASSWORD field. Select OK, and then select Next.
  13. On the Azure AD sign-in configuration page, ensure that in the USER PRINCIPAL NAME drop-down list, the userPrincipalName value is selected.
  14. Select Continue without matching all UPN suffixes to verified domains and then select Next.
  15. On the Domain and OU filtering page, select Sync selected domains and OUs.
  16. Expand Contoso.com, clear the checkbox next to Contoso.com and ensure that the only following check boxes are selected: IT, Managers, Marketing, Research, and Sales. Select Next.
  17. On the Uniquely identifying your users page, select Next.
  18. On the Filter users and devices page, select Next.
  19. On the Optional features page, review available options, but do not make any changes. Ensure that Password hash synchronization is selected, and then select Next.
  20. On the Ready to configure page, ensure that Start the synchronization process when configuration completes is selected, and then select Install.
  21. When configuration is complete, select Exit. Note: At this time, synchronization of objects from your local Active Directory Domain Services (AD DS) and Microsoft Entra ID formally (Azure AD) begins. You should wait approximately 3-4 minutes for this process to complete.
  22. Close all open windows.

Task 2: Verify synchronization in Microsoft Entra ID formally (Azure AD)

  1. On the taskbar, select Microsoft Edge.
  2. In the address bar, enter https://admin.microsoft.com.
  3. At the Sign-in prompt, enter admin@yourtenant.onmicrosoft.com and then select Next.
  4. At the Enter password page, enter the password for the Admin account and then select Sign in. Note: Check with your instructor on the password to use for signing in with the Admin account.
  5. At the Save password prompt, select Save.
  6. At the Stay signed in prompt, select No. The Microsoft 365 admin center opens.
  7. Select the Navigation menu and then select Show all.
  8. In the Navigation pane, under Admin centers select Identity. The Microsoft Entra admin center opens.
  9. In the Microsoft Entra admin center, in the navigation pane, select Users > All users.
  10. Verify that you see users from your local AD DS. Ensure that these users have the value Yes in the On-premises sync enabled column.
  11. In the Navigation pane, under Identity, select Groups > All groups. Verify that you see groups from your local AD DS. Ensure that these groups have the value Windows Server AD in the Source column.
  12. Select the Managers group.
  13. On the Managers group page, select Members and then ensure that you see users. Note that you cannot add to or remove members from this group, as it is sourced from the local AD DS.
  14. Close Microsoft Edge.

Results: After completing this exercise, you will have successfully configured Azure AD Connect to synchronize identity from Active Directory Domain Services to Azure Active Directory.

END OF LAB

Categories // MD-102

  • « Previous Page
  • 1
  • 2
  • 3
  • 4
  • 5
  • 6
  • Next Page »

ads

SPONSORED
FirstCloud.es

Blockchain Solutions for Startups

Launch your payment gateway 90% cheaper than traditional providers. Backed by Polygon and Ethereum.

Get Free Consultation β†’
No credit card required β€’ Cancel anytime

Search

Copyright © 2025 Β· Modern Studio Pro on Genesis Framework Β· WordPress Β· Log in